Eastern Congo is an area of the world with no shortage of sad stories and it seems like an unlikely destination for tourism. But despite it’s violent history and current state of insecurity, some brave (or stupid) souls are braving the guerrillas to see the gorillas and, in my case, hoping that Mount Nyiragongo in Virunga National Park stays calm for a couple of days while we scramble up it.
Virunga National Park has recently been given a bit of well deserved attention due to the fantastic, Oscar-nominated documentary Virunga, putting the park on the radar of travellers seeking a bit of adventure. For those of us living in Rwanda, travel to the DRC isn’t a far-off fantasy and arranging a trip to the park is actually surprisingly simple thanks to their excellent Virunga NP website.
I’ve recently taken a trip up (and, thankfully, also back down) Mount Nyirangongo, home to Africa’s most active volcano and the world’s largest lava lake, and this article aims to give you a complete start to finish account of how to plan your own trip. Practical tips, advice, and all of that good stuff that doesn’t seem to yet exist in the world of DR Congo tourism.
Booking Your Mount Nyiragongo Hike
The Virunga National Park website used to be surprisingly wonderful and easy to use and now it’s a bit more confusing which is a bit disappointing to see. But still, it gives you all of the ‘how to book’ information you’ll need to have a good experience, and more importantly, they have a beautiful, fully functioning online booking platform which gives you confidence that your hard earned money isn’t being sent into an online Congolese abyss.
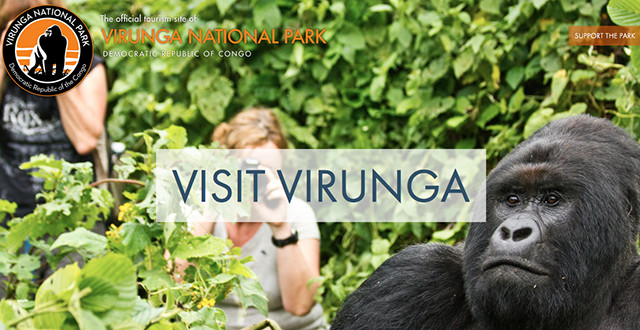
Go to the main page and click ‘Visit Virunga’ which will then take you down into all of the information about the park, including the packages that are possible to book. Have a read through this whole page as there’s a lot of good info there and then click on ‘Nyiragongo’ or visit this direct link for information on booking the actual hike. There’s a ‘Book Now’ button that doesn’t seem to be working currently, but I found the correct URL for booking in a roundabout way – https://bookings.visitvirunga.org/packages/nyiragongo.
Choose your permit and any extra options (for food or food and gear… both of which seemed like a decent value but we opted to bring out own) and then pick your date and pay. Done! It’s a very easy process and the park staff are quite responsive by email to any questions you might have about the trip. The website also has a section with a bunch of practical advice on what to expect which is a useful read, in addition to this article.
Getting a Visa
Five years ago when I wandered into Rwanda I took a trip to Goma on a whim getting a $30 visa at the border. Easy peasy! But oh how times have changed and shortly after that trip, I’d heard that visas for the DR Congo cost $250 and could only be applied for in your home country. A bit of a drastic change and kind of a killer for tourism but, fear not, because Virunga NP is looking out for us.
Virunga National Park Visa
Most tourists planning a trip into the park won’t be residents of Rwanda and won’t qualify for a regular DRC visa so the park has come up with a genius deal which offers park-specific visas good for the Goma area for people who book one of several attractions in Virunga National Park. Once you’ve booked your Mount Nyiragongo hike (or you can see other packages here including gorilla trekking), you qualify for a park visa. It’s all very easy and everything can be done on the website. Book and pay for your park visit first and then use that confirmation information to book your special Virunga DRC visa. The visas are valid for 14 days and the fees aren’t refundable.
CEPGL
Residents of Rwanda (anyone with a work or business visa) are in luck because we’re eligible for a visa called the ‘CEPGL‘ which grants access to Burundi and the DRC for the low, low price of $10. For all of the juicy information on how to get this wonderful little gem of a visa, check out my article called ‘Applying for your CEPGL for Burundi and the DRC‘ and all shall be revealed.
Regular Visa for the DRC
I have no freaking idea. I guess check with the DRC Embassy wherever you live? I’m pretty sure you have to apply from your home country and I’m pretty sure it’s super expensive. If you’re a tourist with plans to travel to various places around the DRC then you’ll have to get this legit visa since the park visa is only for the Goma area.
Visa Issues
One out of the three in our group had a problem with their visa and the reason was never quite made clear. I was given a contact number and made a semi-frantic call (it is the DR Congo border, after all) to him to see why my friend’s visa was seemingly missing in action. We gave him our order number (make sure to have this four digit booking code handy) and he said he’d call me back when he figured things out. Thirty minutes later he called back (I think he had to actually go into the office as it was Sunday) and said that there was a problem because my friend said her arrival date would be June 7th instead of July 7th. Given that we booked the trip on June 15th and it’s impossible to book for days that have already passed, I’m dubious about this explanation. But the point is to be vigilant about checking your visa once it’s been booked because things can go wrong and had we not gotten to the border a couple of hours before it closed, we’d have been out of luck. Someone made a mistake and I’m pretty sure it wasn’t my friend.
Transportation to Goma and Virunga National Park
Because this is a Kigali-related site, I’m going to give transportation instructions assuming you’re leaving from there. Plus it’s the main place to fly into if you want to visit Virunga NP. I can’t imagine too many people make the commute from Kinshasa.
Goma is just across the border from Gisenyi (Rubavu) which is about a 3 to 3.5 hour drive from Kigali. If you don’t have your own vehicle you can easily catch a bus from the Nyabugogo bus station. Buses cost around Rwf 3,000, and generally leave every half hour. If you’ve got a lot of bags you’ll probably want to stake your claim to good seats and stash your bags on a bus that’s not yet full which will probably mean waiting about 20 to 30 minutes for it to leave. No need to book tickets in advance.
Or if you’d rather be fancy (or have a lot of stuff like us un-fancy people) then you can hire a taxi for $80 to $100 including fuel. The quote I was getting from Kigali drivers was $100 but drivers in Gisenyi seemed happy to do the trip for $80. So we probably could have bargained harder in Kigali. Between four people it worked out to be worth it, especially considering the mountain of crap we would have had to take on the bus.
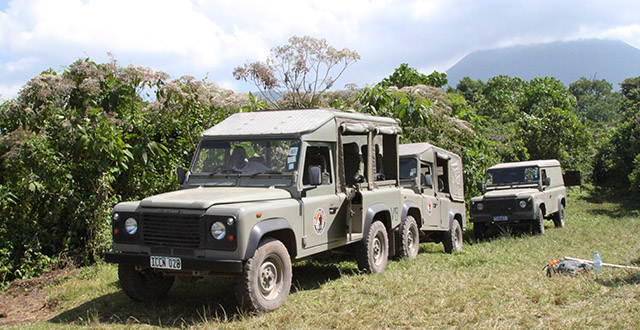
From Goma to the park entrance you have a few options. We opted just to go with the park transportation which, at $28 per person per way is pretty ridiculous, especially since we were four people. We just figured that booking through the park would eliminate any possibility of confusion so we just bit the bullet. If you opt for this, you’ll have to book your transport on their website. You’ll want the ‘Goma – Kibati’ and ‘Kibati – Goma’ options to cover a round trip. They’ll pick you up either at your Goma hotel or the DRC side of the border, just make sure to communicate where you’ll be.
I later asked at my hotel in Goma how much a trip to the start of the hike would cost and they told me $80 which, if you’re a few people, makes a lot more sense. Arranging a taxi for a set price might be tricky though unless you have a taxi contact in Goma or are staying at a hotel. A couple of brave souls took motos to the park entrance though I didn’t get the price for this. The roads aren’t horrible but they’re not great and you’ll pass plenty of giant trucks so you’ll be pretty dusty on arrival. But it’s an option!
The trip to the park entrance is a bit of an annoying one. First you stop at their office to show your printed booking form and collect a paper receipt. This took about 20 minutes for eight people. Then we headed off to the park entrance with a stop along the way outside a ranger’s house, apparently. Another 20 minutes for no reason that I could figure out. Then on we continued to the park which, without the stops, is about a 30 minute drive. At the hike entrance we waited around again for about 45 minutes to an hour. So if you’re arranging your own transport, try to figure out when the hike actually starts and give yourself enough time for the office stop. I don’t think we really needed to leave at 8:30am.
The Mount Nyiragongo Hike
The Mount Nyirangongo Volcano hike is something I’ll never forget. It’s also something I never want to do again. Holy crap it was cold up there and the trek was certainly a challenge on my unfit legs. But I’m very grateful to have had the opportunity to go on the hike and the fitness to just barely get me up and down. It was a tough slog and not recommended for people who never do any sports. Like the poor Burundian dude who had to be carried up the last third (and most difficult part) of the mountain. Not, as I found out later, due to altitude sickness, but due to not being the type of guy who never does anything active. It was pretty surprising given that he’s a young guy without a bit of fat on him so I guess let that be a warning to you! If you’re completely out of shape, do a bit of training in advance.
To give you another indication of the difficulty level, while I go to the gym fairly regularly, I seem to have spent more time in bars than in the gym during the weeks leading up to the hike. I probably should have been worried when walking 1 minute from the lake to the top of my hotel up a steep slope caused me to be winded. But on the hike, while I wasn’t blazing a trail and our pace overall was pretty slow, I managed to stick to the middle of the pack going up and going down. So being crazy in shape isn’t a requirement, either.
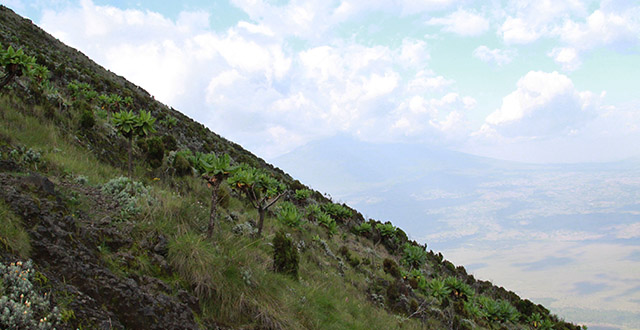
The first hour or so of the hike is pretty mild and not so steep but I felt like our pace was a bit quicker than I would have liked, so I found it to be tough. The first break was well-received and I managed to catch my breath pretty quickly. The middle part of the hike is where it gets a bit steep but it’s the loose volcanic rocks that make it tricky, especially on the descent. The hike is steep but the pace was slow which made it seem easier than the first part, at least for me.
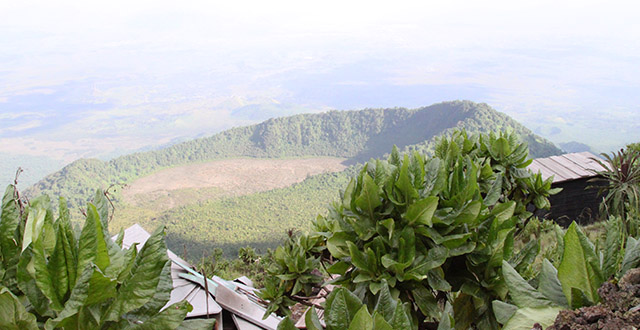
The killer is the last hour of the hike where you can see the top but have to scramble up, figuring out your own path as you climbed. Because there really isn’t one set path to the top, everyone in our group kind of just did their own thing which meant that we could set our own pace. Seeing the huts so close but feeling like it’s taking so long is frustrating, but you’ll get there!
While I was winded and cursing myself and the volcano at various stages, I never once felt like I wouldn’t make it. It’s a challenge for sure but one that you’ll be proud of yourself for once you finish. Just don’t go into it expecting it to be a breeze because you’ll be miserable pretty quickly.
The Top
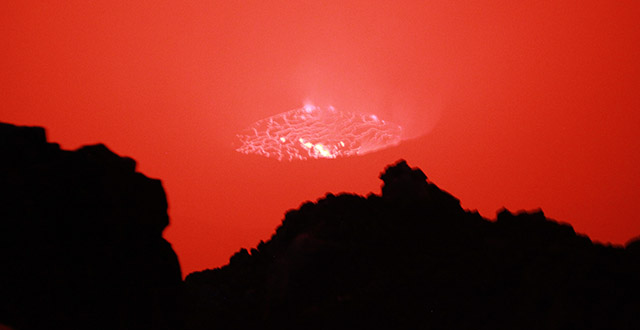
The top, the glorious top! I’ve never been so happy to see the crater of a volcano in all my life. The payoff isn’t immediately obvious since, during the daylight, the volcano’s fiery lava lake doesn’t shine so brightly. But even without seeing the lava clearly (yet)… you’re at the top of a freaking volcano! That’s pretty damned cool and it’s beautiful but we came to see fire and that’ll have to wait until the sun goes down at around 6:30 pm.
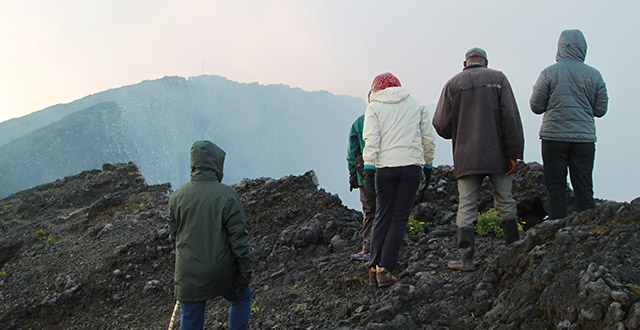
Once at the top we had a little look around, snapped some photos, were scolded for getting too close to the edge, and then we retreated to our tent area to ‘set up camp’, get warm, and get dinner started. We ended up hanging around down there for awhile after the sun went down before heading up to see the fiery wonderfulness. It’s truly an amazing sight and totally worth the difficult trek and frigid weather.
The Summit Shelters
Accommodation at the top of Mount Nyiragongo is inside smallish triangular tents that are pitched inside rough a-frame buildings, some with doors, most without. The accommodation is very basic and has seen better days, but you’ll be provided with a decent mattress and pillow (which I wasn’t expecting at all) and it does the trick. The tents aren’t huge and you’ll be in close quarters with your tent buddy, especially since some of them seem to be built on a slight angle which means you’ll roll into them (which is great for keeping warm!) This won’t matter unless you’re a single traveller since you might find yourself bunking with a stranger, possibly of the opposite sex. Something to keep in mind in case spooning with strangers isn’t really your thing.
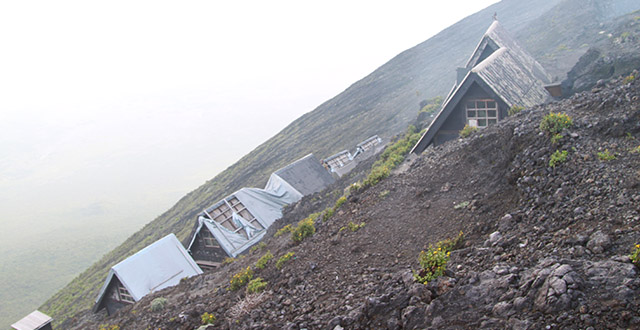
There are supposed to be eight cabins, each for two people, but I only noticed where six of them were. Three are up closer to the crater’s rim and three are down below. The higher level accommodation allows you to pop out of your tent for a look in the crater at a moment’s notice while the lower cabins mean an annoying and precarious trek up to the top, so you might be less likely to make multiple visits. I’m told the higher cabins are colder due to wind though and they’re also farther away from the death-defying journey to the bathroom so each location comes with a few pros and cons.
The Aftermath
There’s a wonderful feeling that comes when you take on Africa’s most active volcano and win. A feeling of being able to accomplish anything and a thirst for more adventure to come. But that feeling fades fast, my friends, and the volcano shall exact her revenge when it’s all said and done. If you’re anything like me, you’ll spend the next few days walking up and down stairs and hills like a 90-year-old with two prosthetic legs. It’s not an unmanageable pain, but you might want to consider your activities for few days after your hike. Basketball and triathlons are probably a bad idea. Reclining in hammocks and napping both come more highly recommended, however.
Packing List
I’ve done exactly one overnight hike ever in my life – Mount Nyiragongo. I’m no expert on the matter of what to bring up to the top of a fiery volcano on a camping trip but, luckily, I had plenty of friends do the hike before me who were happy to bestow me with tips and advice. Taking their advice on board, I think we were able to get a good idea of what to take with us and, as the generous little person that I am, I’m going to pass that knowledge onto you.
Clothes & Gear
- rain jacket
- rain pants
- running shoes
- heavy fleece
- light sweater
- thin stretchy pants
- long underwear
- 4 pairs of socks
- heavy sleeping bag
- air mattress (they provide a mattress so I didn’t need this)
This list doesn’t include what I wore up the hill which was a pair of hiking shoes, thin stretchy pants that could be rolled up above me knees (which looked totally awesome, as you can imagine), and a sleeveless top. I kept the rain gear and the light fleece in my small backpack that I carried myself along with a water bottle, camera, iPhone, passport, and some snacks.
I ended up changing into regular gym style running shoes when I got to the top and decided to give those a try on the way down and they were totally fine. Not much ankle support which made the rolling loose volcanic rocks on Mount Nyiragongo a challenge, but I feel like the hiking shoes would have hurt the backs of my ankles. Plenty of people did the hike in sneakers, some people wearing jeans and a dress shirt, and others were fully kitted out in all the gear. Except for people being cold, nobody complained about the gear they hiked up in, as far as I could tell.
Food & Drink (for 4 people)
- 4.5 litres of water each (I only ended up drinking about 2.5 litres of that and the rest was used for cooking and rinsing dishes)
- 4 tins of Campbells chunky soup
- 2 chocolate bars
- 6 apples
- 6 bananas
- 4 boiled eggs
- 2 packs of Hobnobs
- 2 bags of weird fiber biscuits
- instant coffee
- packet of hot chocolate
- powdered milk
- whiskey & coke
We were so excited about our chunky soup that we sort of forgot to get any lunch or breakfast. Thankfully we tided ourselves over nicely on biscuits, fruit, and boiled eggs that we thieved from our hotel’s breakfast buffet. Since we spent the weekend between Gisenyi and Goma, we didn’t really have an opportunity to prepare food for ourselves. We were really thankful of that hot meal at the top and I’d say the extra prep is worth it. Some friends even went so far as to prepare chili in Kigali, freeze it, and then heat it up at the top of the volcano. And others still were quite happy with biscuits and peanut butter and jam sandwiches.
Everything Else
- iPhone (would you believe there was reception up at the top though I brought it for the extra camera)
- camera
- iPod (which I didn’t use since we had a great group and the chitter chatter was entertaining)
- 4 plastic bowls
- 4 plastic cups
- a metal cooking pot
- bag for garbage
- toilet paper
- charcoal (available to buy at the bottom, before the hike)
- matches
- walking stick (bought it at the bottom)
- plastic bags to keep your stuff dry if it rains
What We Missed
We were actually pretty ok and lucky that we were tenting next to a master fire starter but I would have added a small bottle with a bit of kerosine in it to get the coals going. Plus I probably would have brought a few more chocolate bars because, when is that ever a bad idea? Otherwise I’d say we were pretty well-prepared and not in need of anything, really.
But the reason we were so prepared was because of oodles of great advice from friends who had conquered the volcano before us. I hope that this ridiculously long article has brought together all of the info and added more and that it helps you plan a wonderful trip to a truly amazing place.
Tips and Advice for the Hike
Having successfully climbed Mount Nyiragongo without any major mishaps or stories of woe, I feel like I’ve accomplished something! But had I not been given some great advice from friends, things might have turned out differently. Hopefully these tips will come in as handy for you as they did for me!
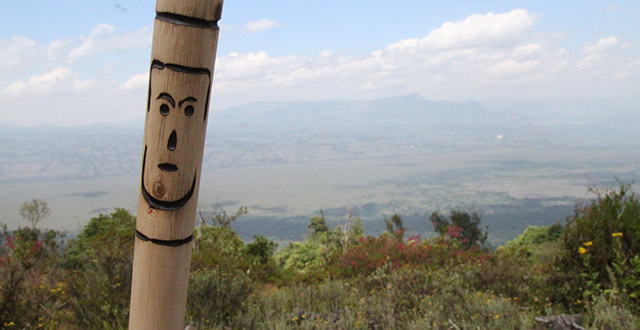
- The best piece of advice I got about this trip was “When the man at the bottom asks you if you want a walking stick, you say ‘yes’.” I can’t image how beat up I would have been without that glorious little $5 piece of carved stick. I’m still not clear whether that price was to buy it or to rent it but it’s money well spent and it saved me from painful, rocky falls on several occasions.
- Pack twice as many warm clothes and fuzzy socks as you think you’ll need and don’t forget gloves and a hat that covers your ears.
- Make sure to hire a porter because carrying a bulky bag up a volcano is sure to suck badly.
- Don’t be a dick to your porter and make sure you give the guy a decent bag to carry your stuff in. I’m sure they’re completely willing and totally able to carry up a rolling suitcase, but be nice and try to track down a decent backpack for your hike if you don’t already own one.
- You won’t need to cart up your own tent, pillow, or mattress because they’re provided but everything else is your responsibility right down to toilet paper and bags for your garbage so don’t forget these little things.
- We decided that a hot meal at the top would be a well deserved reward so we bought a few tins of chunky soup and I honestly think the extra hassle was totally worth it.
- If you’re planning on making a fire and hanging around outside of your tent a bit after your time up next to the crater, I’d recommend grabbing one of first two tents on the bottom level. There are three in a row and the first two tents have canvas in between them, benches, and a raised fire pit which makes a good place to hang out.
- We also opted to bring instant coffee (which brought us instant joy) which also meant bringing a bit of extra water and cups.
- Whiskey is your friend.
- If you’ve been sweating a lot, make sure to change out of your base layers at the small hut before the final push to the top. This is where things start to get really cold and you won’t want to strip off at the top, trust me.
- This hike would suck in the rain so make sure to say some quick prayers to the volcano gods the day before for good weather.
- The DRC border closes at 6pm so get there with plenty of time to deal with any visa issues. We would have been screwed had we not given ourselves two hours.
- Goma is a cool city so don’t rush away! Spend a couple of nights in town. We stayed at Caritas Guesthouse ([email protected]) which was pretty good. Just stay away from their spaghetti carbonara, otherwise the rest of the food is good.
That’s it! That’s all! Everything that you need to know to plan your very own hike up Mount Nyiragongo in the DRC. It’s a pretty epic trip and I’m so happy to have finally made the effort to do it. It’s really easy to organise, especially from Kigali, so take all of this sage advice from an experienced volcano-conqueror (that’s me!) and go!




We went as soon as it opened and was a great experience. I can’t emphasize enough how easy it is and how great their website is. A million times better (and 1/100th the time required) than trying to do anything at RDB. Once you get your CEPGL and get over your fear of crossing the border, I recommend seeing the Eastern Lowland Gorillas near Bukavu. Only $200 and just as easy as booking the volcano trip. Nice long weekend road trip. You’ll have to wear face masks and the guides make you stay the required distance from the gorillas (instead of porters encouraging you to touch gorillas in Rwanda for extra tips), but a fantastic trip without all of the automatic weapons.
Just did this hike this weekend! It was incredible! A few takeaways:
– Had a great experience with the Visit Virunga website & staff. They organized our visas, our transport between the border and the park, and the park entry. Super professional, reliable, and responsive when we had questions via email in the weeks leading up to the trip
– Like I said, we just did this trip, so it’s early July and that made for pretty good weather. It was about 6C (42F) at the summit, which is def chilly but not unbearable, it was clear so we had a great view of Goma, the stars, and the volcano, and there was no rain! Cannot overstate how much this would have sucked if it were raining
– I did the hike in regular running shoes. Hiking boots would have been better, of course, but the good ol’ Asics did not disappoint. Don’t skimp on the warm clothing at the top. I didn’t pack a lot of technical hiking wear because I don’t have it, but I had on several layers and actually felt ok. A full change of clothes at the top is a must! You don’t want to be stuck in wet, sweaty clothes when the sun sets
– A little bit of training is probably a good idea before this hike. It’s a lot of steep uphill walking (duh) and requires some agility to handle the loose stones and tricky footing in places. The hardest part for me was near the top, which is a free-for-all scramble over loose stones and a steep incline. Going down again in the morning over that terrain was pretty much the worst, but everyone is very patient and the guides are helpful, and step by step, you can make it! The hiking stick you can buy at the base was a life saver! Just $5!
– Restrooms: Hole-in-the-ground situation at the Virunga base camp where the hike started, pee in the woods situation throughout the hike, hut/sit on a hole in a bench bathroom at the summit. This one requires a short jaunt down the volcano using a rope (sounds more intense than it is) and faces out, away from the volcano/summit camp
– There were 22 hikers in our group, from all over the world. This turned out to be one of the greatest joys of the hike! So much camaraderie as we slogged up to the top together
– Maybe the “tents” have been updated since this post was written? There were metal cabins up there when I went, with a frosted window on the back side and a latching door on the other. Mattresses and pillows were flimsy but doable for the night. I felt completely sheltered from the wind and the worst of the cold temperatures in them.
Great article, thanks for writing this! I wanted to ask… What is the actual temperature range on the top in winter, e.g. feb or summer july? Are we talking technical ski thermal base layers and oC or negative oC values?
Do you think we might be able to depend on the kindness of others for some hot water, or is it really a BYOF situation?
Perfect Article,
For those who would like to hike the Nyiragongo Volcano and track Mountain Gorillas In Virunga National park can visit our website http://www.congodiscoverysafaris.com
We are Based in Goma Congo, and we offer tours in all Congo national Parks for a reasonable Price.
Kind Regards
Barack
NYIRAGONGO & GORILLA TREKS IN VIRUNGA, DRC RE-OPEN SOON! BOOK NOW! at [email protected]
We are very pleased to inform you that Virunga National Park is resuming tourism 15th February 2019.
Green Hills Ecotours is offering a set of packages which give visitors the opportunity to experience the Virunga Park’s most popular offerings, including Nyiragongo and mountain gorilla treks.
A list of package details from 2days to 4days trip options, as well as the 2019 rates sheet is available on request. Book your trip at: [email protected]
Safety in Virunga to Climb Nyiragongo volcano & Visit Gorillas is our TOP PRIORITY:
Virunga National Park is dedicated to ensuring the highest safety and security of all its visitors. Virunga Rangers are trained at international standards for visitor protection, including close protection, communication, first aid and evacuation procedures. In addition, Park management oversees the security environment by maintaining close ties with local authorities, community leaders, embassies, UN agencies and NGOs.
Tourism will resume from 15th February 2019 and
Green Hills Ecotours has started to receive bookings to Climb Nyiragongo active volcano; Visit Gorilla trek with opportunities to stay inside the park with a full support to process Your Congolese Tourist Visa.
For additional information and making your bookings for Virunga National; Contact Green Hills Ecotours ( [email protected]) or call: +250 72222 0000